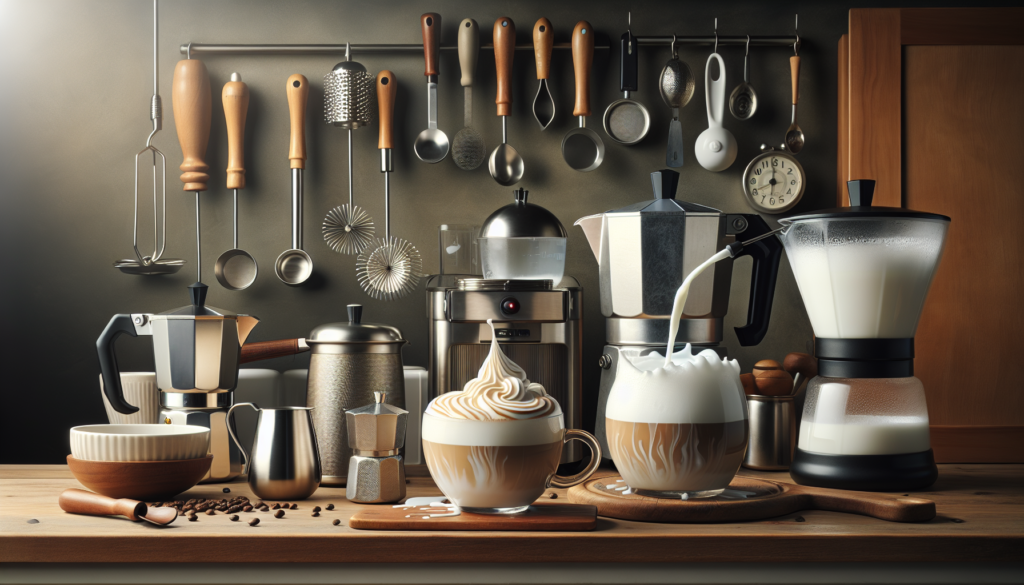
Imagine being able to create beautiful and intricate latte art right in the comfort of your own home. It’s possible, and all it takes is mastering the art of frothing milk. Frothing milk is the key to achieving that creamy and velvety texture that allows you to create stunning designs on the surface of your latte. Whether you’re a coffee enthusiast looking to impress your guests or simply want to treat yourself to a café-worthy experience, this article will guide you through the step-by-step process of frothing milk at home for latte art. So grab your milk pitcher and get ready to unleash your inner barista.

Understanding the Importance of Frothing Milk for Latte Art
The role of frothed milk in latte art
Frothed milk is a crucial component in creating beautiful latte art. It provides the base and canvas for the intricate designs that make lattes visually appealing and enjoyable. The texture and consistency of frothed milk are important in achieving the desired patterns and shapes in latte art. By incorporating air into the milk, frothing creates a creamy and velvety texture that enhances the overall taste and aesthetic of lattes.
Benefits of frothing milk at home for latte art
Frothing milk at home for latte art not only allows you to unleash your creativity but also has several benefits. First and foremost, it saves you money from constantly buying lattes at cafes. Additionally, frothing milk at home gives you full control over the type and quality of milk used, allowing for a customized latte experience. Moreover, mastering the art of frothing milk enhances your barista skills and provides a sense of satisfaction and accomplishment.
Choosing the Right Milk for Frothing
Whole milk
Whole milk is often recommended for frothing due to its higher fat content, which contributes to a creamier and smoother texture. The fat in the milk helps stabilize the foam, making it easier to achieve consistent results. However, some prefer a lighter taste and opt for alternative milk options.
2% or reduced-fat milk
2% or reduced-fat milk is a popular choice for frothing as it strikes a balance between creaminess and lightness. The lower fat content ensures a lighter mouthfeel without compromising on the ability to create froth and foam.
Non-dairy alternatives
For those who are lactose intolerant or prefer non-dairy options, there are numerous plant-based milk alternatives available. Almond milk, soy milk, coconut milk, and oat milk are commonly used in frothing. It’s important to experiment with different non-dairy milk options to find one that achieves the desired froth consistency and taste.
Organic and hormone-free options
Choosing organic and hormone-free milk options is a personal preference that aligns with a commitment to supporting sustainable and ethical farming practices. While it may not directly affect the frothing process, selecting these options ensures your latte art journey is in line with your values and supports responsible agriculture.
Essential Tools and Equipment
Milk frother
A milk frother is a handy and efficient tool specifically designed for frothing milk. It can be handheld or electric, and the method of operation may vary depending on the model. Milk frothers create froth and foam by rapidly agitating the milk, creating tiny air bubbles that give the milk its creamy texture.
Electric whisk or handheld blender
If you do not have a milk frother, an electric whisk or handheld blender can be a suitable alternative. Although they require a bit more effort and manual operation, they can still achieve a satisfactory level of frothing. Simply immerse the whisk or blender into the milk and vigorously whisk or blend until the desired froth consistency is achieved.
French press or manual frother
A French press or manual frother can also be used to froth milk. These devices work by creating a pressurized environment, which produces frothy milk. Pour the milk into the French press or manual frother, and then move the plunger up and down vigorously until the milk froths.
Steam wand on an espresso machine
If you own an espresso machine with a steam wand, you have a powerful tool for frothing milk at your disposal. The steam wand emits steam at high pressure, allowing for precise control over the frothing process. Submerge the steam wand tip into the milk and turn on the steam. Position the milk pitcher at an angle and move it up and down to create froth.
Thermometer (optional)
While not essential, using a thermometer can help ensure the milk reaches the desired temperature for frothing. This is especially useful for beginners who are still learning to judge the temperature by touch. Simply immerse the thermometer into the milk while frothing to monitor the temperature.
Preparing the Milk for Frothing
Chilled or room temperature milk?
The temperature of the milk can affect the frothing process. Chilled milk is often preferred as it helps to maintain the froth consistency and prevents overheating. However, some baristas prefer to use milk at room temperature, producing a slightly different texture. Experiment with both options to find the temperature that suits your personal preferences.
Determining the amount of milk
The amount of milk needed for frothing depends on the size of the latte you wish to make. As a general guideline, fill the frothing pitcher about halfway to allow room for expansion during frothing. Remember that milk expands when frothed, so it’s essential not to overfill the pitcher.
Pouring milk into the frothing pitcher
To ensure even heat distribution and consistent froth, pour the milk into the frothing pitcher, taking care not to create unnecessary bubbles. It’s best to pour the milk in a steady and controlled manner, avoiding any sudden movements or vigorous pouring. This allows for a smoother and more even frothing process.

Frothing Techniques and Tips
Using a milk frother
If you have a milk frother, the process is relatively straightforward. Fill the frothing pitcher with the desired amount of milk, ensuring not to exceed the pitcher’s maximum capacity. Place the whisk attachment into the pitcher and turn on the frother. Move the whisk up and down or in a circular motion to create the froth. Adjust the frothing time according to your preferences.
Using an electric whisk or handheld blender
If you’re using an electric whisk or handheld blender, the technique is similar to using a milk frother. Immerse the whisk or blender into the milk and turn it on. Move the whisk or blender in an up and down or circular motion within the milk to create the froth. Be sure to use a deep enough container to prevent splattering.
Using a French press or manual frother
When using a French press or manual frother, pour the milk into the container, ensuring not to exceed the maximum fill line. Place the plunger with the froth attachment into the container and screw it onto the lid. Push the plunger up and down quickly and vigorously until the desired froth consistency is achieved.
Using the steam wand on an espresso machine
For those lucky enough to have an espresso machine with a steam wand, frothing milk becomes a more professional and precise process. Start by purging the steam wand to eliminate any condensed water. Submerge the wand tip just below the milk’s surface and angle the milk pitcher slightly to create a swirling motion. Gradually raise the milk pitcher while maintaining the steam flow to create a velvety microfoam.
Common mistakes to avoid
When frothing milk, it’s important to avoid a few common mistakes that can hinder the outcome. Firstly, avoid overheating the milk, as it can scorch and impact its flavor. Additionally, be mindful not to introduce excessive air into the milk, as this can result in larger bubbles and an uneven froth consistency. Finally, always clean and maintain your frothing tools to ensure the best results.
Achieving the Perfect Milk Texture
Understanding milk froth consistency
Having the right milk froth consistency is crucial in creating latte art designs. The ideal texture is known as “microfoam,” which consists of small, velvety bubbles that seamlessly blend into the milk. Microfoam allows for better control when pouring intricate latte art designs and creates an appealing visual contrast against the coffee.
Creating microfoam for latte art
To achieve microfoam, practice with different frothing techniques and experiment with the duration of frothing. As a general rule, aim for a glossy and creamy texture without any large bubbles. The milk should have a silky and smooth appearance, allowing it to easily transition into the desired latte art design.
The importance of temperature control
Temperature control is vital in achieving the perfect milk texture for latte art. Overheating the milk can scorch it, resulting in a less desirable taste. On the other hand, milk that is too cold may not froth properly or create the desired texture. Consistently monitoring the milk temperature during frothing ensures optimal results.
Using a thermometer (optional)
Using a thermometer can help ensure precise temperature control while frothing milk. The ideal temperature for frothing is typically around 150 to 155°F (65 to 68°C). However, this can vary depending on personal preference and the type of latte art design you are aiming to create. While a thermometer is optional, it can provide valuable guidance for beginners.
Pouring Techniques for Latte Art
Choosing the right milk pitcher
Selecting the right milk pitcher is essential for pouring latte art designs. Ideally, choose a pitcher with a pointed spout that allows for better control and precision when pouring. The size of the pitcher should be suitable for the amount of milk you use, ensuring it’s neither too large nor too small.
Positioning the milk pitcher and cup
Positioning the milk pitcher and cup correctly is important to achieve the desired latte art design. Begin by holding the pitcher with the handle facing towards you and the spout pointing towards the cup. This allows for better control and a smoother pour. Tilt the cup at a slight angle, enabling the milk to flow evenly and create the desired patterns.
Pouring techniques for basic latte art designs
When starting with latte art, it’s best to begin with basic designs such as hearts or rosettas. To create a heart, start by pouring a steady stream of milk into the center of the cup. As the cup fills, move the pitcher closer to the surface of the latte and gently wiggle it from side to side. This will help form the top half of the heart. To complete the heart shape, quickly pour a line through the center and drag it downwards, forming the bottom half.
A rosetta design is created by pouring a stream of milk into the cup, slightly off-center. As the milk fills the cup, move the pitcher in a back-and-forth motion while gradually moving towards the opposite side of the cup. This will create the signature leaf-like pattern that characterizes a rosetta.
Practicing advanced latte art designs
Once you have mastered the basic designs, you can progress to more advanced and intricate latte art designs. These may include tulips, swans, or even free pour designs. Advanced designs require patience, practice, and a steady hand. It’s important to keep experimenting and refining your pouring technique to achieve the desired results.
Creating Latte Art Designs
Overview of common latte art designs
Latte art designs encompass a wide range of patterns and shapes that can be created using frothed milk. Some common designs include hearts, rosettas, tulips, and etching techniques. Each design requires specific pouring techniques and milk froth consistency to achieve the desired outcome. With practice and patience, you can develop your own unique style and create stunning latte art.
Heart design
The heart design is one of the most popular and beginner-friendly latte art designs. It involves pouring the milk in a way that creates a symmetrical heart shape in the center of the cup. The key to mastering the heart design lies in controlling the milk flow and achieving even symmetry in the shape.
Rosetta design
The rosetta design is characterized by its leaf-like patterns that fill the cup. It requires a steady hand and smooth pouring technique to achieve the desired outcome. Practicing the rosetta design allows you to develop precision and control in your pouring, resulting in delicate and intricate patterns.
Tulip design
The tulip design is a more advanced latte art design that adds elegance and sophistication to your lattes. It involves pouring multiple layers of milk to create the shape of a tulip. Mastering the tulip design requires precision, timing, and a well-controlled pouring technique.
Etching techniques
Etching techniques involve using a tool (such as a toothpick or latte art pen) to create detailed patterns and designs on the surface of the latte. This technique can be combined with other latte art designs, allowing for further customization and creativity. Etching is a skill that requires patience, practice, and a steady hand to achieve impressive and intricate designs.
Troubleshooting Common Issues
Milk burning or scorching
One common issue in frothing milk is the risk of burning or scorching the milk, which can result in an unpleasant taste. To avoid this, make sure to monitor the milk temperature closely and stop frothing once it reaches the desired temperature. If using a steam wand, properly purge any condensed water from it before frothing to prevent scorching.
Large bubbles or improper froth consistency
If you notice large bubbles or an inconsistent froth consistency in your milk, it may be due to introducing too much air during the frothing process. To achieve a smooth and velvety texture, focus on creating microfoam by gently incorporating air into the milk. Practice different frothing techniques and adjust the duration of frothing to achieve the desired froth consistency.
Milk temperature too hot or too cold
Achieving the correct milk temperature is crucial in frothing, as it influences the taste, texture, and ease of pouring latte art designs. If the milk temperature is too hot, it can scorch or alter the taste. Conversely, if the milk temperature is too cold, it may not froth properly or integrate well with the espresso. Use a thermometer as a guide to achieve the desired temperature range.
Inconsistent or messy latte art designs
Inconsistencies or messy latte art designs can be frustrating, especially when you have put effort into frothing and pouring. To achieve more consistent designs, ensure your milk froth consistency is uniform and smooth. Practice your pouring technique, focusing on maintaining a smooth and steady stream of milk. Take your time and be patient, as mastering latte art requires practice and perseverance.
Cleaning and Maintenance
Properly cleaning milk frothing tools and equipment
Regular cleaning of milk frothing tools and equipment is essential to maintain their performance and prevent the buildup of milk residue. After each use, rinse the frothing pitcher, milk frother, or other tools with warm water to remove any milk residue. Use a small brush or sponge to clean hard-to-reach areas. Periodically, deep clean the frothing tools using a mixture of warm water and mild detergent.
Regular maintenance tips
To ensure your milk frother or other frothing tools remain in optimal condition, follow these maintenance tips. Avoid immersing electric frothers or handheld blenders in water and instead wipe them with a damp cloth. For manual frothers, disassemble them and clean each part thoroughly. Regularly inspect your tools for any signs of wear or damage and replace any worn-out parts as needed.
Extending the lifespan of your milk frother
To extend the lifespan of your milk frother, it’s essential to handle it with care and follow the manufacturer’s instructions. Avoid using excessive force or applying pressure on the frother components, as this can cause damage. Store your milk frother in a dry and cool place to prevent any corrosion or damage from moisture. Regularly clean and properly maintain your frother to ensure its longevity.
Storage considerations
When storing your milk frother or other frothing tools, ensure they are completely dry to prevent the growth of mold or bacteria. If the frother has removable attachments, disassemble and store them separately to prevent any damage or misplacement. Consider using a designated storage container or bag to keep all your frothing tools organized and easily accessible.
In conclusion, frothing milk is a fundamental skill for creating latte art and elevating your coffee experience. By understanding the importance of frothed milk, choosing the right milk, mastering essential tools and equipment, and employing proper frothing techniques, you can achieve the perfect milk texture for latte art. With practice and patience, you can create stunning latte art designs that add a touch of beauty and creativity to your homemade lattes. Remember to troubleshoot any issues that may arise, maintain your frothing tools and equipment, and enjoy the process of honing your barista skills.

